As I sit here eating a delicious Cinnamon Crunch bagel in Panera on a beautiful Saturday morning, I thought this would be the perfect time to write about the WLAN Pi Go and my initial impressions of it so far after only a few days of having it. Thanks Om for the push!
The WLAN Pi Go (Go) was officially launched on July 30th, 2025 via a live YouTube stream by the WLAN Pi team. Since I learned about the Go, I knew it was likely an immediate purchase for me. In fact, I ordered one from Josh’s BigQAM store before the live stream was even over.

Initial Impressions
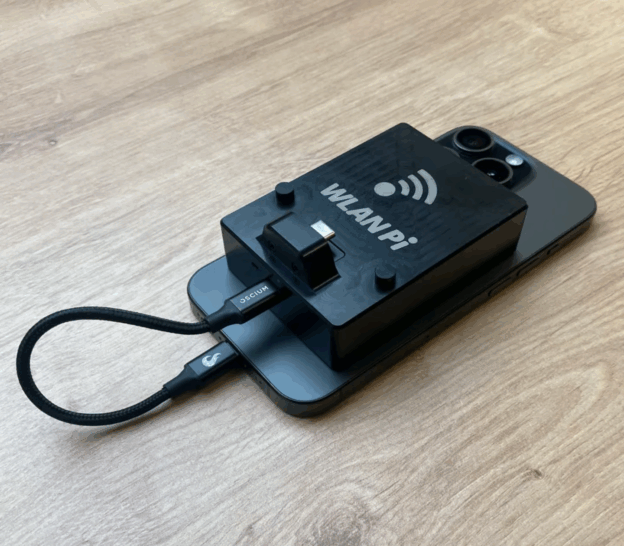
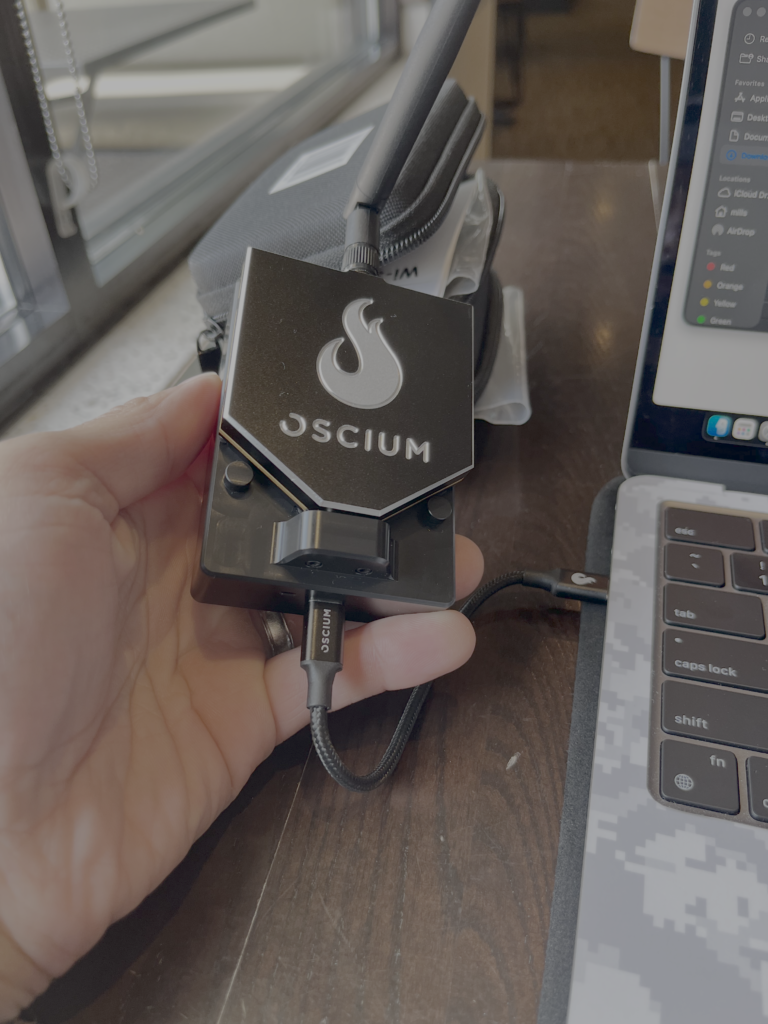
When I took the Go out of its ruggedized case that’s provided by Oscium for the first time, I was impressed with the build quality and robustness of it. I wouldn’t want to drop it by any means, but I also don’t fear that it would break or fail if I did drop it from say 1-3 feet in the air.
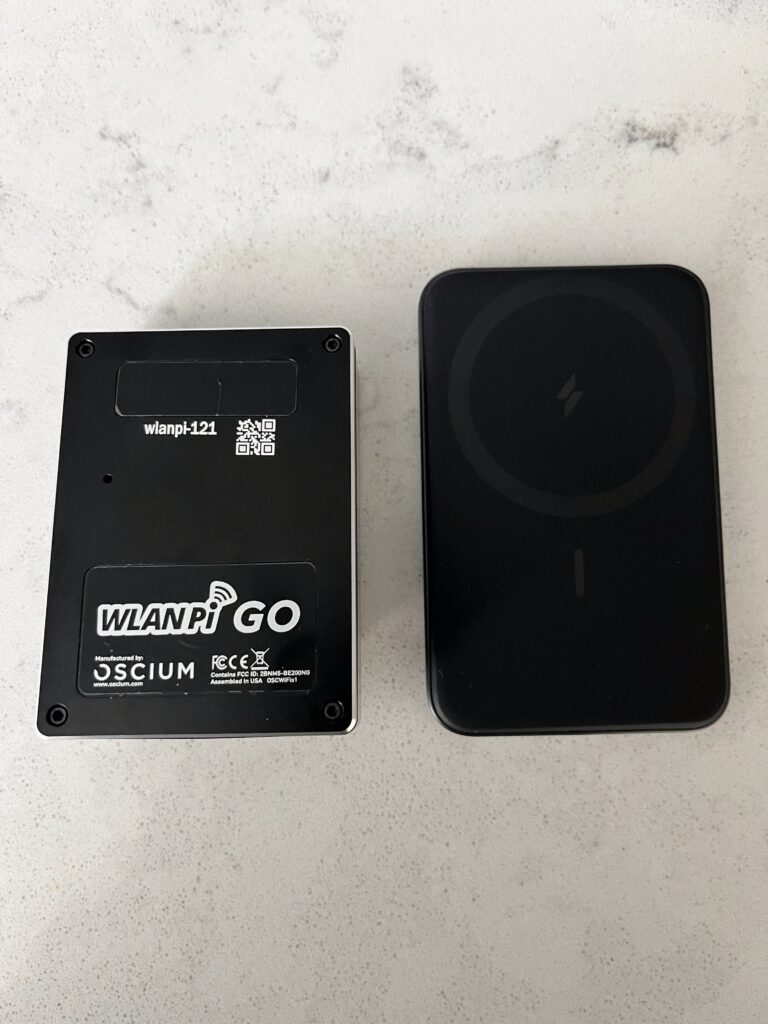
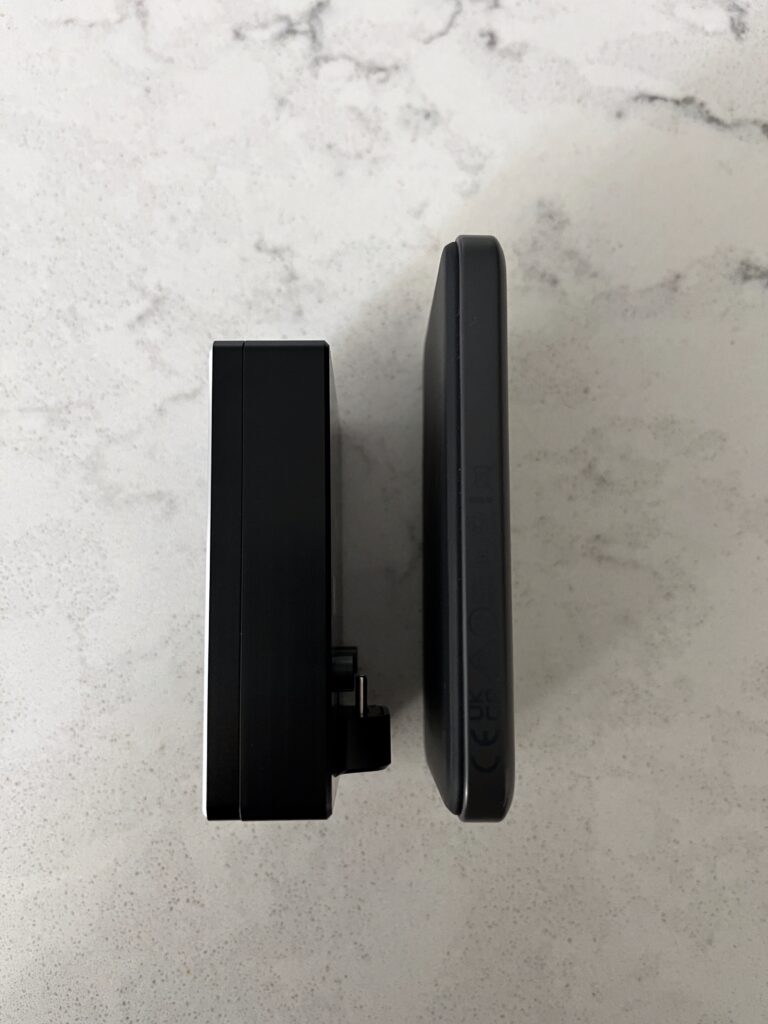
It’s also chunkier and heavier than I expected it to be! It’s not small and has some heft to it, but it’s also not much larger than your typical MagSafe battery pack from Anker or UGREEN.
The magnetic hold seems to be as strong as my Anker battery pack which is rather strong. It stays put on my iPhone that sits inside of a Zagg MagSafe case. The only thing I will say is that the bottom of the Go tends to slide left to right a lot more than my battery pack. I believe this is due to the difference in materials. The battery pack is a rubbery texture while the Go is more slick and smooth.
Use cases
Wi-Fi analysis
Anyone that uses an iPhone or iPad knows how limited the landscape is for Wi-Fi analysis or anything else Wi-Fi troubleshooting related for that matter. You basically have the Apple’s Airport Utility and that’s it. There have been some pretty good shortcuts created by smart people in the community that provide some context about your current Wi-Fi connection, but nothing that provides passive scanning capabilities. The Airport Utility’s UI hasn’t been updated since I became aware of it back in 2019 and it’s just not very good if I’m being honest. The scan interval is somewhat slow and you cannot lock in on a particular BSSID or channel. The best you can do is filter on a specific SSID and get information all APs advertising that SSID over the air. Not to mention, the screen will go to sleep on you if you don’t constantly wake it (or change your screen settings) and if that happens, the scan will stop. Very frustrating!
So like most Wi-Fi pros that I know, I carry a spare Android phone with me for the times when I need a very basic and quick way to perform Wi-Fi analysis. There are a ton of tools available on the Android platform which has always made me somewhat envious of people who use Android as their primary mobile device. Why, Apple, why?
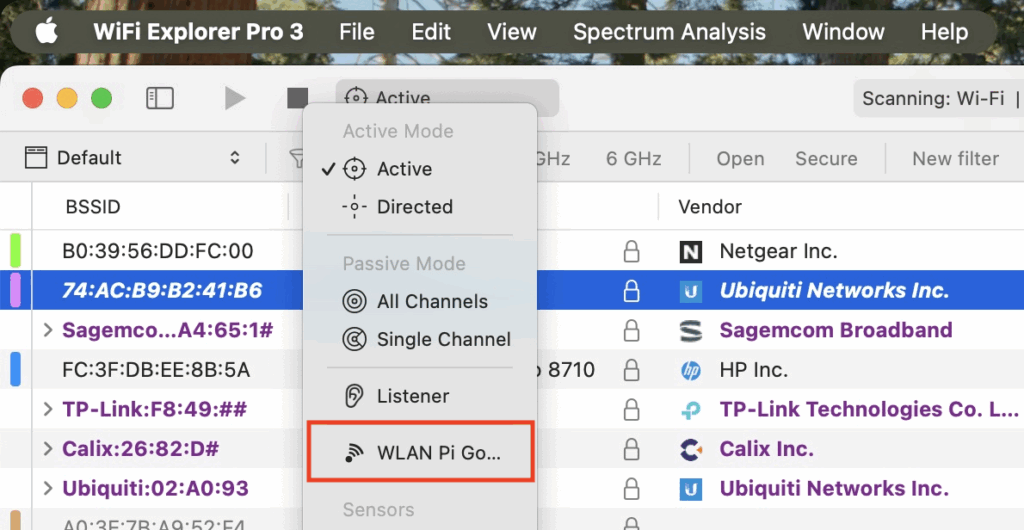
With Adrian’s WiFi Explorer Pi (currently in beta) iOS/iPadOS app, we can now use any WLAN Pi that is supported for REAL Wi-Fi analysis, including the Go. It has a beautiful UI, very similar to his full blown WiFi Explorer/Explorer Pro apps, but designed specifically for the more mobile iOS UI. Adrian also added a feature for the Go that gives you the ability to do some foxhunting with the built-in “finder” capability that features a live, real-time graph and an optional audible sound as you move closer or further away from the BSSID you’re searching for. The Go is locked to that BSSID and channel which makes finding transmitting devices so much easier. Bravo, Adrian!
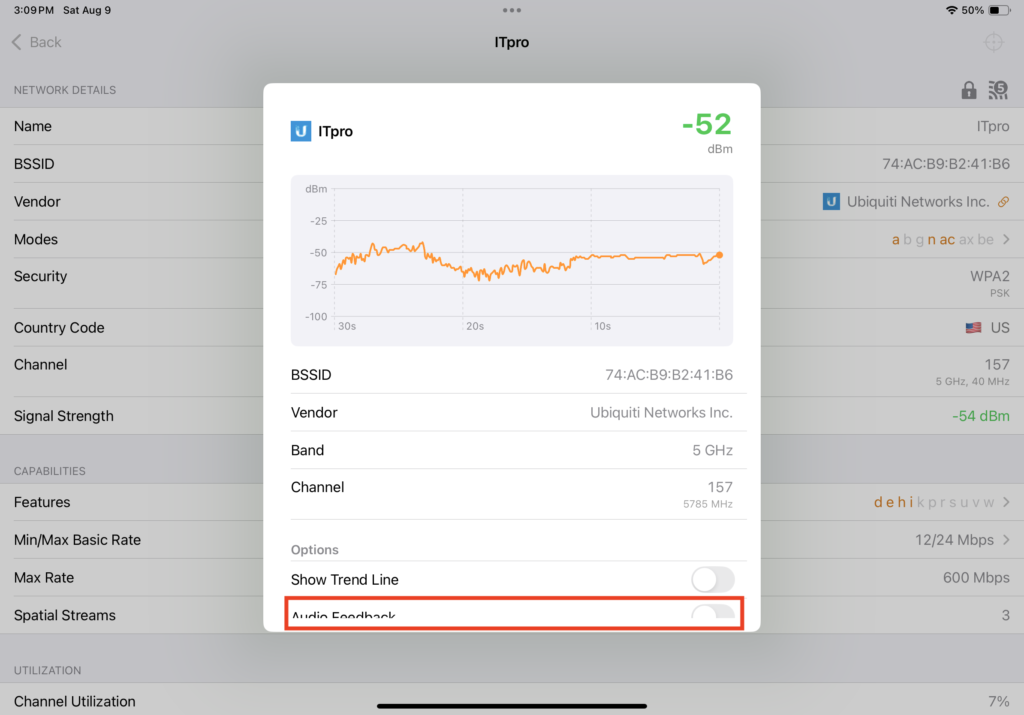
The app’s settings also provides the ability to prevent the screen from going to sleep. YAS!!!
Packet captures
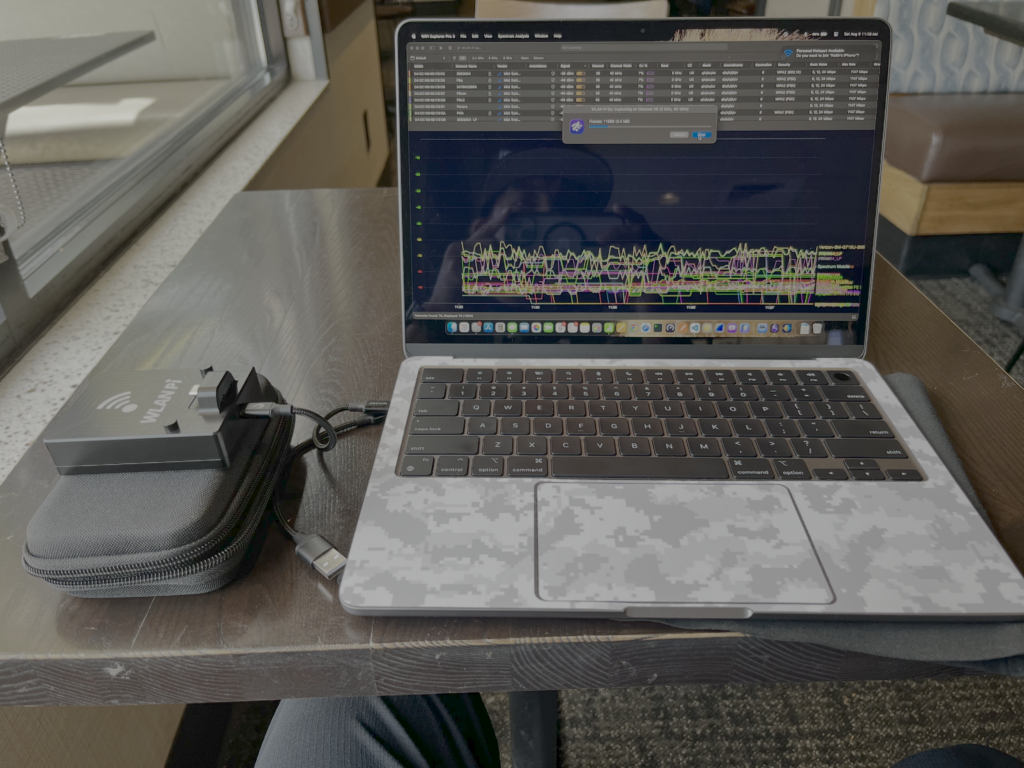
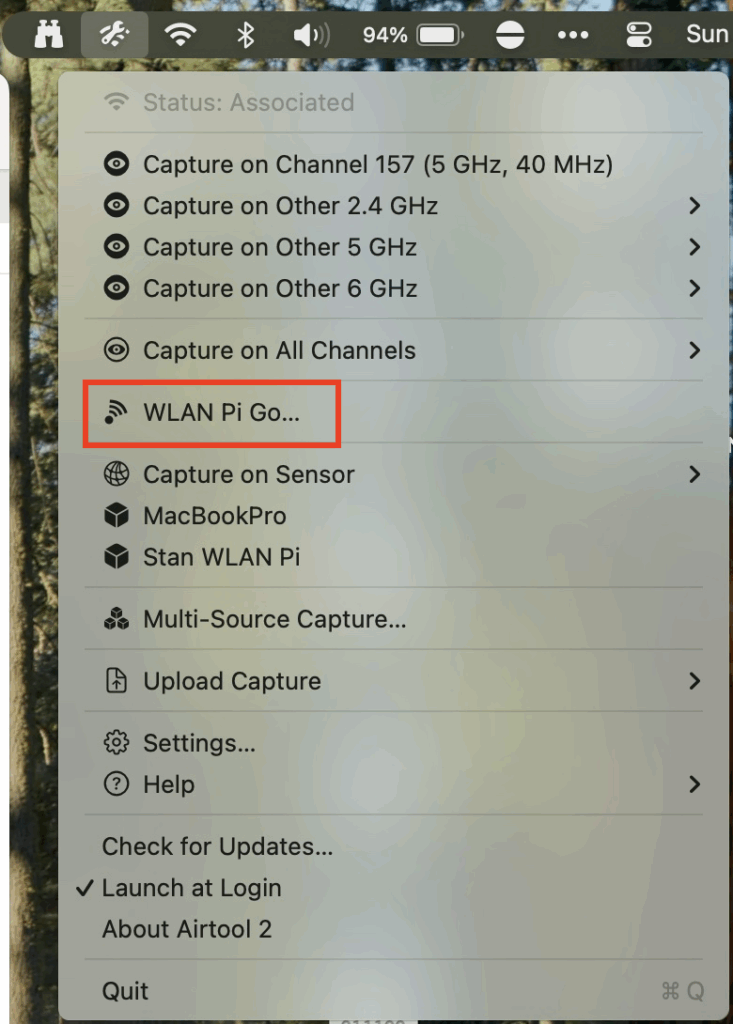
If you’re familiar with Adrian’s Airtool 2 app on macOS, you’ll be right at home with his Airtool Pi app on iOS/iPadOS and you will love it. You can perform packet captures on any of the WLAN Pi’s that are supported and even do multi-channel captures on the Pis that support multiple Wi-Fi adapters or if you have multiple Pis. With the Go, you’re limited to just one channel since there’s only one Wi-Fi NIC onboard, but in a pinch, this functionality is amazing to have at your disposal! I just captured some random traffic on ch 36 while taking another bite of this bagel. Mmmm… Cinnamon sugar and packet captures.
The Go is automatically recognized in Adrian’s apps since it has to be plugged into your device to receive power and communicate with the host device. If you’re on macOS, you may have to accept an initial security alert to allow it, but that’s it. It’s that simple and you should see it as an available sensor immediately.
Spectrum Analysis
If you have an Oscium Wi-Spy Lucid, you can (or will be able to in the future) perform spectrum analysis while connected to the Go. That’s incredible especially with how the Go’s case was purposefully designed to physically accommodate them; you can tell it was well thought through.

As I said, the Go will be able to do this in the future according to the team. To my knowledge and as of this writing (8/9/2025), there isn’t a way to do this. Not on Android, iOS/iPadOS, macOS, or Windows. The WiFi Explorer Pi app doesn’t seem to have this functionality built in at all and I’m not sure if it ever will. If you plug the Go into your Mac, it doesn’t seem to work in WiFi Explorer Pro 3 either. Oscium’s website does mention software coming soon for it and they did show a demo using an iPhone with the Chanalyzer app on the live stream, but who knows how much it will cost.
*** Note *** Researching this more on 8/10/2025, it does appear that Oscium also provides this functionality on the Metageek app, but the app only works on Windows and is rather expensive retailing at $1500.
*** Note #2 *** As of 8/14/2025, Matt Lee from Oscium mentioned that the Lucid AND Clarity should work with the Go for spectrum analysis. I do not have a Clarity to test with, but I will trust that coming from the company that manufactured these tools.
*** Note #3 *** Speaking with Adrian on 8/14/2025 about the SpecAn functionality with the Go and WFE Pro 3 on macOS, it should work, but there is a service called oscium-spectrum that needs to be stopped and/or permanently disabled if you want to be able to use it. I tried this, but it did not work and have reported that back to Adrian. If I hear something different or if it starts working, I will update this section.
Hopefully, a more low cost or free solution will emerge at some point in the near future.
*** Note #4 *** As of 12/12/2025, Matt Lee from Oscium mentioned that the Chanlite app for iOS will be free! Awesome news!
Surveying
With the WiFi Explorer Pi app and the finder functionality, you could very easily use the Go as a survey tool for gathering attenuation values of various door and wall materials. Setup an AP in the environment you want to learn more about and instead of using an AirCheck, Nomad, or SideKick as your measurement tool, use the Go to gather those recordings.
Additionally, Jerry who works for Hamina mentioned during the live stream that surveying with the Go is also possible. Now, it won’t scan as quickly as the other more purpose-built tools, but having another tool that’s cheaper than the AirCheck and Nomad available that can be used to survey with software like Hamina Onsite is amazing. Just keep in mind, you will likely need to walk much slower to collect enough data so maybe this is best with smaller footprints.
Profiling
The Go supposedly has the same ability to perform profiling as the other WLAN Pis. There are 3 ways to start the Profiler app with the Go.
- From the free WLAN Pi app (Android / iOS)
- From the Pi’s web UI (visit https://10.42.0.1 in a web browser from the device connected to the Go)
- From the CLI (SSH’ing to 10.42.0.1 from the device connected to the Go using wlanpi/wlanpi as the default username and password)
No matter how I’ve tried to start the Profiler app, my devices never discover the SSID used to profile and I have not seen any Beacon frames with the SSID in any OTA captures so I am not able to profile any of my devices with the Go at this time. It feels like a bug, but I’m going to keep digging a little more before reaching out to the team. I’d be interested to hear if anyone has been able to get this to work for them.
API
I haven’t had to opportunity to do a lot of playing with the WLAN Pi API yet, but it is available and does work on the Go. I don’t imagine a scenario where I would leave the Go behind unlike maybe the R4 or M4/M4+, but I suppose you could leave it behind and leverage the API remotely to gather some stats.
If anyone has any cool use cases for the API, please reach out and let us all know.
Considerations and limitations
- WLAN Pi Go does not have its own battery which means it will rely on AND drain your device’s battery. Be prepared
- It cannot connect to any networks as a client device. It is strictly meant to be a passive device
- Proper validation surveying with Hamina Onsite requires a license. Onsite is $780 per year / per user
- Some of the apps like Adrian’s Airtool Pi and WiFi Explorer Pi are not supported on Android and there are no plans to support it. That severely limits the effectiveness of this tool in my opinion if you’re an Android user
- Speaking of Adrian’s tools, Airtool Pi does cost $14.99 and I’m sure at some point once WFE Pi comes out of beta, Adrian will charge for that app as well. Let me be clear on this. I have nothing against him charging for these apps and I 100% support him as a small-business and indie developer, but it’s something to consider if you’re on a tighter budget. Not all batteries are included with the Go
- The Lucid is a separate $999 purchase if you want the ability to perform spectrum analysis… sometime in the future and who knows what that app will cost and if it will support both Android and iOS
- MagSafe is currently only supported on iPhones or cases with MagSafe. Yes, you can buy MagSafe mounts and put them on your devices or cases to make it work, but today, it’s only natively supported on iPhones and cases with MagSafe capabilities. According to rumors, this may change on August 20th as Google prepares to announce their new Pixel 10 phones and the rumored “PixelSnap” functionality
Final thoughts
$550 may seem expensive, especially for a device with limited abilities. However, for the few features I’ve outlined above and because I love what the WLAN Pi team is doing, it’s worth it to me to invest in myself and their development. If you can afford this tool, I would highly recommend grabbing it because I believe that things are only going to get better as more apps are developed for it and bugs are squashed. I especially recommend buying one if you primarily use Apple devices and don’t want to carry around an additional Android phone or purpose-built device to perform qucick Wi-Fi analysis or basic packet captures.
A word of caution though.. As you saw in a couple of the pictures, I was connected to my MacBook Air while at Panera. My iPhone 13 uses the Lightning port and not USB-C, which is not recommended to use by the WLAN Pi team. This limits the portability of my setup because I’ll have to use my iPad Pro if I want to use any of Adrian’s apps. Hopefully, I’ll be correcting this issue soon when Apple releases the iPhone 17, but until then, I will use the Go with my Google Pixel 6a, iPad Pro, or MacBooks. If your Apple devices have the Lightning port, you may want to think about upgrading to a model with USB-C.
Great job WLAN Pi team! Congrats on another amazing product.
Other important links
- Go FAQ
- Go supported mobile devices
- BadgerFi store (EU and international)
- BigQAM (US)
- Oscium WLAN Pi Go data sheet
- Oscium WLAN Pi Go user guide
- Airtool Pi
- Metageek app
Random content
If anyone knows someone that manages Wi-Fi for Panera, let them know they’ve got an AP SOSing at Panera cafe #204989